Tuesday, January 13, 2015

I Cried Today

I cried today.

For not one particular reason really.
But for a lot of reasons.
Out of a purely broken heart.
Broken at the state of our nation.
Broken at the state of our churches.
Broken at the state of our people.
Broken at the state of the lost.  The invisible.  The broken.

Psalm 34:18 (NASB)  The Lord is near to the brokenhearted and saves those who are crushed in spirit.

Sometimes I want to just stand outside my door and scream “STOP!”
I want everyone to just stop what they’re doing.  Stop what they are not doing.
Stop being so busy.  Too busy.
Stop not caring.  Stop accepting less.
Stop ignoring.  Stop being broken.


I stopped and prayed today.

For not one particular reason really.
But for a lot of reasons.
Out of a purely hopeful heart.
Hopeful for the future of our nation.
Hopeful for the future of our churches.
Hopeful for the future of our people.
Hopeful for the future of the lost.  The invisible.  The broken.

2 Thessalonians 3:5  (NASB)  May the Lord direct your hearts into the love of God and into the steadfastness of Christ.

Proverbs 3:5-6  (NASB)  Trust in the Lord with all your heart and do not lean on your own understanding.  In all your ways acknowledge Him, and He will make your paths straight.

Sometimes I want to just stand outside my door and shout “LISTEN!”
I want everyone to just listen for God.  Listen to Him and not the noise of the world.
Listen with a quiet mind.  An open heart.
Listen with intent.  Listen with a desire to hear God.
Listen for God’s Words of truth.  Listen for His direction.


I listened and shared today.

For not one particular reason really.
But for a lot of reasons.
Out of a purely purposeful heart.
Purposeful for the future of the lost.  The invisible.  The broken.
Purposeful for the future of our people.
Purposeful for the future of our churches.
Purposeful for the future of our nation.

Sometimes I want to just stand outside my door and yell “SHARE!”
I want everyone to just share God's Word and promises.  Share God's plan for our lives.
Share with love for others.  With a burdened heart.
Share with passion.  Share without fear.
Share God’s grace and salvation.  Share God.


I shared and rejoiced today.

For not one particular reason really.
But for a lot of reasons.
Out of a purely grateful heart.
Grateful for the God who saves the lost.  Sees the invisible.  Heals the broken.
Grateful for the God who loves our people.
Grateful for the God who leads our churches.
Grateful for the God who holds our nation.
Grateful for the God who secures the future of our world.

Philippians 4:4  Rejoice in the Lord always; again I will say, rejoice!

Sometimes I want to just stand outside my door and declare “REJOICE!”
I want everyone to rejoice in the freedom God brings.  Rejoice in His forgiveness.
Rejoice in His love.  With the world, with the church, with our people.
Rejoice in His healing.  Rejoice In His care and provision.
Rejoice in knowing one day this world will pass and God will reign victorious forever!


Today I cried.  Stopped.  Prayed.  Listened.  Shared.  Rejoiced.  Did you?

Thursday, January 8, 2015

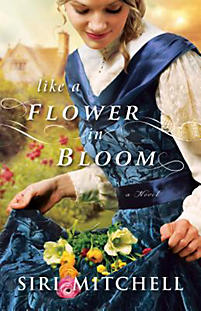
Like a Flower in Bloom Book Review

Recently I was provided a newly-released book free of charge by Bethany House Publishers in exchange for my book review.  The book I was delighted to read was the new fiction/historical romance title by Siri Mitchell – Like a Flower in Bloom.


Even today, women struggle with the life they want to have and that which is expected of them by others, either in society or in the eyes of family.  While most of us in the “free world” have the luxury of pursuing a career in whatever field we excel, there are still a great many women who don’t get a choice, or voice, in the matter.  In Like a Flower in Bloom, Siri Mitchell brings us the plight of one such young lady from the Victorian era who battles for her heart’s desire over societal expectation.

The setting is Cheshire, England in 1852.  The story is told by none other than the main character herself - Charlotte Withersby.  Charlotte is a 22-year old young lady who lives with her botanist father, assisting him in his botany research and writing.  This is a job for which Charlotte is quite well-suited, and one she is happily resigned to for the remainder of her life. 

Charlotte’s dream is to be a published botanist under her own name, something that was unheard of in that time, especially in the scientific field.  Her uncle convinces her father that she is getting old, and must be more about finding a husband, and less about writing.  The problem of who will help her father in his research and writing is quickly solved by the arrival of Mr. Trimble, a correspondent from the South Pacific who’s been aiding their research efforts for many years.

While becoming more active in the social scene she neither desires nor embraces, Charlotte befriends Miss Templeton, a young socialite who is eager to teach Charlotte proper etiquette.  Miss Templeton agrees to help Charlotte craft a clever plan to give the appearance of seeking a suitor, while making it obvious there is nobody suited for the position. 

                “No one worth your time or trouble.  Of course, I might 
answer differently if you actually wished to marry.  In that case you 
could even consider old Mr. Carew, but the goal is to provoke a man 
into paying you attention enough to raise alarm, but not enough to 
propose.  You’ve issued quite a challenge, Miss Withersby, but I’ve
both talent and time, and if you leave it to my capable hands, you’ll 
soon be back to your life’s work.”

Charlotte hopes that Mr. Trimble will serve as a horrible assistant to her father.  She also hopes that the men she and Miss Templeton choose to feign an interest in for betrothal will be denied by her father.  If the plan should work, Charlotte would return to her father’s side as his assistant and the life she desires. 

Charlotte is a smart, feisty, rather opinionated voice of stubborn will.  She can’t understand why people talk in circles instead of just saying what they mean, and why she should be forced to be someone she’s not, or pursue a life she doesn’t want.  Several “suitors” are found, and Charlotte finds herself in quite the predicament as the book progresses.  Will she end up in dismay, or will there be a man who changes her mind about marriage?  You have to read this book to see what happens.  You won’t be disappointed.

Like a Flower in Bloom is an insightful, yet thought-provoking read with a touch of delightful humor.  Mitchell brings to us characters you can relate to, in lives that are believable, and struggles that not only occurred in the late 1800s, but also appear in our lives today.  From the subtle details to the easy-flowing story line, I’m sure you’ll find this as much of a delight to read as I did. 

Lisa L. Floyd


Sunday, January 4, 2015

Christmas Porch Display

I know Christmas is already over, but I wanted to share the craft project I did for our front porch display this Christmas.  And...perhaps get your opinion.

After searching through a common internet site that lets you "pin" things of "interest" (you know the one), I decided I wanted one of those signs that was so popular as well as a sled with the old ice skates hanging off of it.  A wonderful couple had a legitimate antique sled they sold me for a reasonable price that worked perfectly for what I needed.  Although, living in the South has its drawbacks and I was unable to find an old pair of ice skates.  So I put my own little twist on the display.

While I wanted to use one big board, my husband suggested I let him put together some privacy fence pickets to look a little more unique.  He also sanded, sealed and painted them an off-white color for me.  Free help?  Love it!


After printing out the letters I wanted, I centered them on the boards and taped them in place with painter's tape so it would be easy to remove without leaving residue.


Then I used a pencil with a dull tip to trace over the letters, which left the outline of the letters on the board without leaving any pencil lead marks.  You can see it here with the letter "P".


Earlier in the week my husband and I went down to our local hardware store for the paint. We chose the red color from Behr called "Allure" and had them mix a jar of Color Sample-size using Behr Premium Plus interior-exterior paint & primer-in-one.  (I have not been remunerated in any way by Behr for using or mentioning their product in this post.)  I really didn't have to use much of it so I have plenty left over for future use.  Bonus!


After painting all the letters and letting it dry I coated it with modge podge.  That's really not a necessity, but since I knew I would be storing the signs in the attic where they'd get bumped and scratched, I wanted the extra protection.


While all of that dried, I put some greenery and bows on the sled.  I also have a Wardian Case (like a fancy tabletop greenhouse/terrarium) that I put lights in.  I decorated it on the outside with the same greenery and bow as the sled.

Once everything was done, I tipped a plastic 5-gallon bucket upside down, put some heavy-duty fabric over it, and placed the Wardian Case on it to give it the height it needed.

On the left we put these two:


On the right we put these two:


And here is what the finished product looked like:


After it was all said and done, I looked at it and thought to myself:  "Why didn't I paint the letters bigger so they took up the entire board?"  (Insert face-palm here.)  But as I drove by the house, I realized that the letters were placed perfectly high on the board to make it easier to read to those driving by.  Or at least that's my excuse.  Ha!

Maybe next year I'll paint over it and make the letters bigger.  What do you think?  Should I leave the words the size they are or re-do them in a bigger size?  I'd love to hear your opinion!

The message?  May your lives be filled with the Hope and Peace of our Savior!


Sunday, December 14, 2014

ARWB Ornament Exchange

Christmas crafts always have a special sense of joy about them, and when you receive a hand-made gift of any sort, it makes life that much better.  I'm privileged to be part of the Arkansas Women Bloggers, and especially thrilled to be part of the 2014 ARWB Ornament Exchange.

Those of us who wanted to participate were assigned a "Secret Blogger" for whom we would make a special Christmas Ornament.  My assignment turned out to be a lovely lady named Stephanie from over at www.theparkwife.com.  You need to go read her blog - she's wonderful!  When you get there leave her a message and let her know that you stopped in and that I sent you.

I'm quite embarrassed to tell you that I neglected to take pictures while creating the ornament for Stephanie.  I didn't even take a picture of the finished ornament!  I have no idea how that happened. That's okay though, because this little post doesn't have to be about what I made, but what I received.

Time to thank the person who was assigned to me.  So thank you, Renee, for the wonderful ornament you sent me for our exchange.  Here is a picture of it as it hangs on my Christmas tree this year.  It makes me smile when I see it.  


Isn't it cute?  Renee did a wonderful job with the ornament and I was so surprised to find out that the glitter was on the inside of the ornament, not the outside!  So very clever.  

You can find Renee's tutorial for this ornament on her blog Married and Hungry.  When you get there, look around and leave a comment to let her know you stopped in and that I sent you.

What a joy it is to know that there are kindred spirits out there in the world, eager to be a part of something so fun, and willing to take time out of their busy schedule to make Christmas a little extra special for a total stranger.  

It was a privilege to be a part of spreading Christmas joy by making an ornament to send to someone else, and I'm grateful to be on both the giving and receiving end of this blessing.

I hope you take the time to spread a little joy in whatever way you can, not just this Christmas, but always.

Blessings to all of you!

Sunday, November 16, 2014

Christmas Wreath Time!

The closer it gets to Christmas, the more antsy I get to do all things crafty.  I've had the supplies to make a Christmas wreath for a year-and-a-half, and finally took time to put it together.  It had been so long I almost forgot what I was going to do.  Fortunately I remembered, and all was well in the crafting world.

I thought I'd go through the creation step-by-step so you can make your own with whatever ribbon and mesh you want.  Fair warning - picture overload is about to commence.

And for your inspiration, some classic Christmas MUSICA . 
(Just click on the word "MUSICA" above to hear it.)

First, gather all your supplies.  For this project I have a green double-ringed wreath, a roll of mesh, a roll of a neat little wired twine ribbon that had little open squares in it, a roll of wired polka-dot ribbon, a letter F, some 1/4" white ribbon, and paint (not pictured).  (Please note that although there is some greenery in the picture, I later chose not to use it for the wreath.)


I separated the two rings of branches on the wreath and pulled all the little branches straight so I could easily see where they are.  This makes it easier to use in securing the ribbon, mesh, or whatever else you need.


Knowing I was going to use 12-inch strips of mesh, I measured 12 inches on my arm.  I know...so strange.  But I prefer using my arm as I make the wreath instead of having to grab a ruler to make sure I have the same lengths in each section.  You can use a ruler if you prefer.


Then I folded each corner of the mesh in until I got a little point at the end.


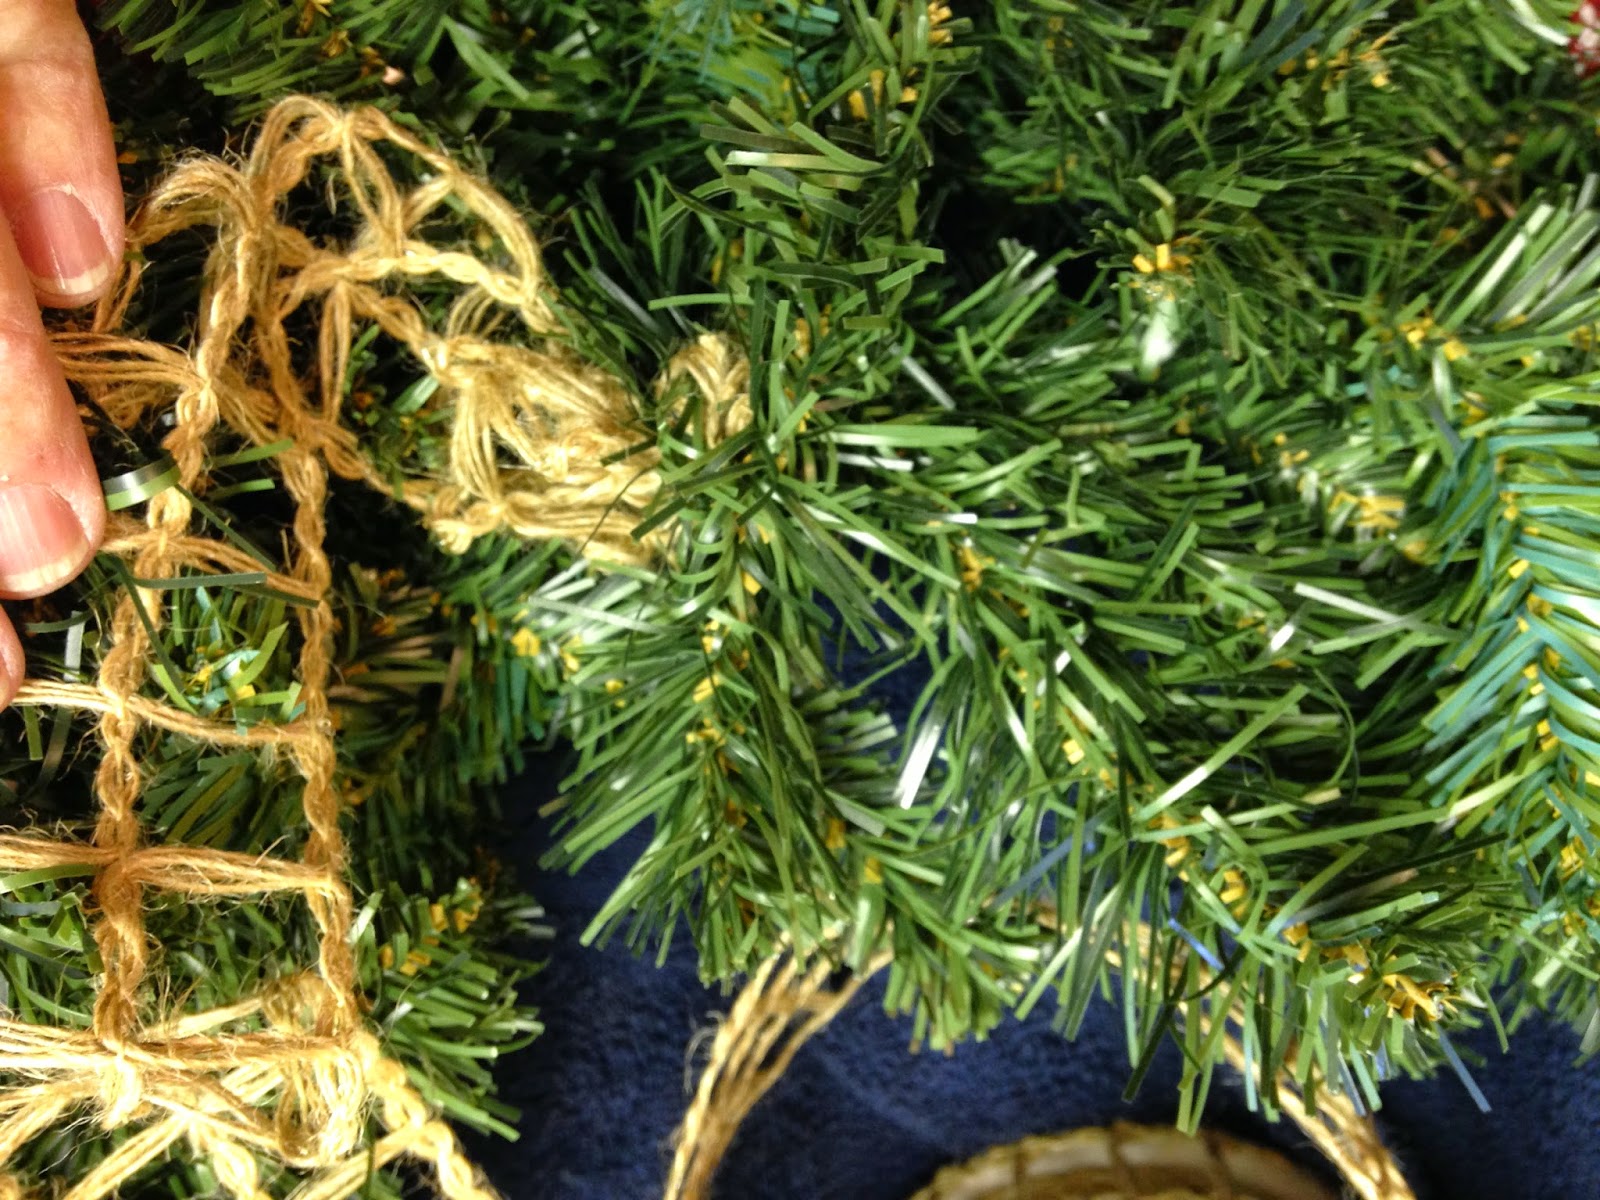
Laying the mesh on the wreath, I twisted two of the branches on the outer ring of the wreath so I could tie the mesh to the wreath, leaving a little bit of a tail.


Because I like to ensure the mesh is extra secure, I folded the tail back over the top and secured it again by twisting the branches around it.


The spacing between each "tie-down" for the mesh is about 6 inches.  Since I like to use my hands, instead of the ruler, I set my hand down on the table and behold - it measured 6 inches!  How cool is that?


After finding the spot 6 inches above where I previously secured the mesh, I measured a strip of mesh 12 inches long.  Folding the length in on itself so the sides met in the middle, I then twisted two of the branches on the outside ring again to secure the new section.  


I did this all the way around the outside of the wreath.


When I got to the end of the wreath, I cut the mesh at about 16 inches in length.  Then I rolled the bottom up and folded it in on itself like I did when I started the wreath.


I secured the end with branches, pulling some of the end through the wreath to the underside so it wouldn't show in the front of the wreath.  Then I secured the end piece to the back of the wreath by twisting two branches around it, folded it over like I did at the start of the wreath, and tied it again. You can see the outer ring completed.


The next step was to secure the wired twine ribbon in the same manner to the inside ring of the wreath.  For this, I kept the roll inside the center so I didn't have to wrestle with the mesh already on the wreath.  It made it so much easier!


I folded the end of the ribbon under itself and twisted two branches over it.


Then I folded it over again, and twisted the branches over it again, just like I did with the mesh.


Starting in the center of one of the mesh bunches, I used the same 12-inch length for the ribbon, and secured it in the same 6-inch spaces, like I did the mesh.  This is what it looked like when it was finished.


In the next step I made five bows with the rest of the wired twine ribbon, and five bows with the wired polka dot ribbon.  I used the 1/4-inch white ribbon to hold the shape of the bows.  You can use floral wire, ribbon, or whatever you prefer.


Placing one of each of the twine bows at the bottom of the wreath, I spaced the remaining four at an equal distance apart on the outside ring of the wreath.  I tied them on by twisting two branches over the center.  Then I did the same with the polka dot bows.  When I was done with all of that, I fluffed the bows and ribbon until I liked the look of the wreath.  I tucked the ends of all the tails around the mesh to create what looked like flowing ribbon, but left the tails of the bottom bows out.


While the wreath looks fine this way, I wanted to personalize it. Because I had to wait for the paint to dry between applications, this was probably the most lengthy process of the wreath.  Crazy, huh?

I always have newspaper available to use to protect the surface I'm painting on, and used a roll of tape with the plastic bag the newspaper came in to raise the letter up, making it easier to paint.  I removed the tag and had my husband drill holes in the top of the letter an equal distance from the edge.


While I could have done this, I thought it would be nice to help him feel a part of making the wreath, and this allowed him to say "I helped make that wreath".  Hey - it's important to include the spouse when you can, right?  I painted on a layer of Kilz on both sides of the letter to seal the wood, and let it dry.


While you can't see it because I forgot to take a picture of it, I painted the back and outer edge of the letter dark brown.  You can see the color on the newspaper below.  I let that dry.  As you can see - I'm a very messy painter, hence the need for the newspaper.  After it was dry, I painted the front of the letter a dark green that matched the wreath.  When the paint was dry, I used glitter glue to outline the letter.


Using regular twine, I threaded it through the holes, tying knots in the front, allowing the rest to use in the back.  I then attached the letter to the wreath, using a zip tie around the twine and the metal wreath form in the back.  Then I used another zip tie to create a strong loop to hang the wreath.  You can barely see the clipped zip tie to the left of the loop in the picture below.


And...voila!  Christmas wreath complete.  Now get out there and make your own!


Love and hugs to you all!

Sunday, October 5, 2014

Happy Fall Y'all!

Last year I featured a Fall craft I did for my front porch decor using branches from a bush I'd trimmed and some fake pumpkins I already had.  You can see the post from last October in the blog archive on the right.

Banners are pretty trendy so I decided to make a little banner for the entertainment center in our living room.  Of course, with as much scrapbook paper as I have laying around, I was able to find the supplies I needed pretty quickly.

Thankfully I own a Cricut, so I used it to cut the triangles out instead of trying to cut all of them out myself.  Not that it would be a problem to do it myself, but it was significantly faster using the machine.

Pardon the lack of pictures for the step-by-step process.  Usually I try to include these so you can get a good visual, but I was so excited to make this that I completely forgot to take them!

At any rate, I chose paper with a Fall leaf pattern for the background, and a solid tan-ish colored lightweight cardstock for the front.  The solid triangle is about 1/4 inch smaller on all sides than the printed background.

The letters, however, were a MUST to cut using the Cricut, as were the leaf shapes.  You could stencil them on the solid color cardstock or use stickers as well.  But I didn't have either, and I'm trying to use what I already have instead of buying new every time.  That helps keep our budget in check and decreases my rather overly-abundant craft room stock.  I used a dark brown lightweight cardstock for the letters and leaf shapes.

After everything was cut, I used my adhesive tape to put it together.  As you can see, I used a brown marker to draw little 'stitches' around the edges of the light solid cardstock for a little more depth and interest.

Here are a few letters and the leaf design I used.


Using a smaller hole punch I punched holes in the top corners of the triangles so I could thread the twine through it to make the banner.

It was very helpful to measure and cut my twine before putting the triangles on so the banner would be the right width and hang on the entertainment center the way I wanted.  

To make sure the letters and leaves stayed put while they hung, I taped the twine on the back of the triangles.  That way it will stay perfectly for years to come as well.

Living in the South for the last 15 years has my speech pattern a bit in the 'southern' way.  So, instead of using "Happy Fall to You", I decided to use "Happy Fall Y'all".  That adds a little whimsy to the banner as well.

And...here is the finished project.  Perfect fit, and perfect little addition to my indoor decor!


Happy Fall Y'all!